I am very very fortunate to have an awesome BFF, who in turn has an awesome sister, who bought her the awesome Rio 14 Day Manicure kit for Christmas! I was also fortunate enough to get to borrow it to create a manicure that would last the duration of my Disney World holiday. :D
The kit contains everything you need to create a manicure that lasts for, guess how long? Correct (I'm going to assume here that you yelled "14 days!" at your screen).
I read up online before using the kit. Basically, professional nail techs (probably obviously) don't like it. More specifically, they don't like the fact that untrained people are using it. Speaking as an untrained person, I can see why, because it is pretty easy to use and, assuming you don't mind a couple of "quirky" looking efforts whilst you're getting used to the products, if you were the right sort of person you could easily replace a trip to the salon with this kit, after a few practice runs.
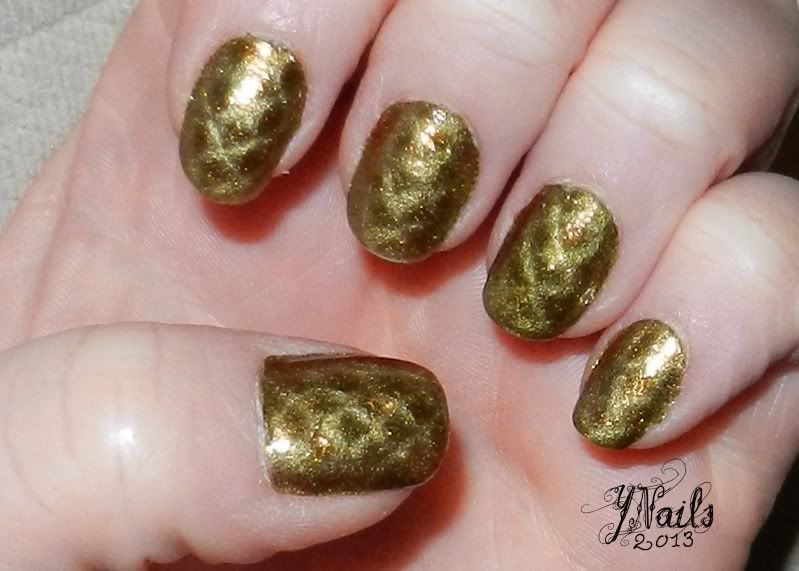
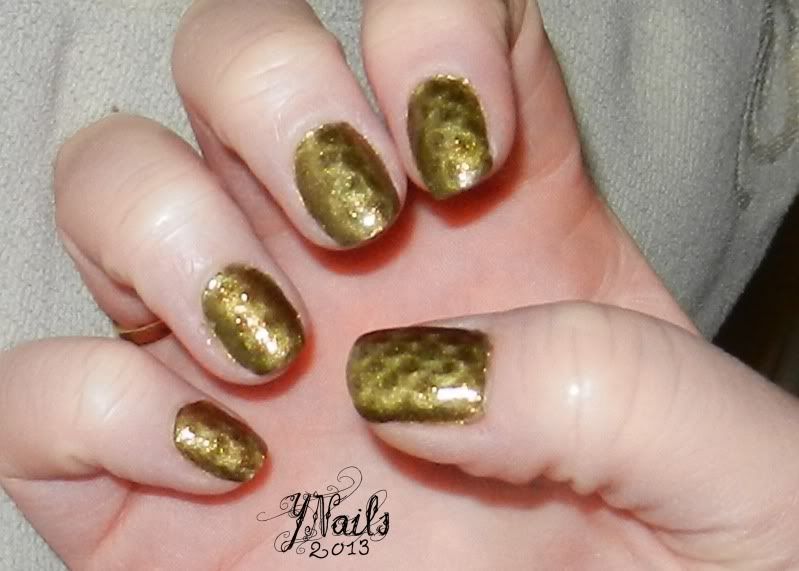
So how does it work? You push back your cuticles. Buff your nails with the whiteblock included in the kit. Wipe over with their "Preparation Lotion" (alcohol wipe) to remove any oils, and then apply the Rio base coat polish. Once that is dry, you apply your manicure, using whatever polish you like. I didn't try glitter, I kind of wish I did now. I DID apply crystals, which the gel seemed to pull away from during the two weeks. I already knew about capping the nail at the end as I do it as a matter of course, so maybe a clear coat of polish to seal in the crystals would have given a better finish. That said, after three layers of gel the crystals were more just a mirrored dot than a faceted crystal, so as the gel pulled back from the crystals and the facets came out, my mani actually got better-looking!! How many manicures improve with age?! Once your polish is completely dry, you begin with the gel, applying three layers, curing under the UV lamp between layers. When all three layers are cured, wipe off the sticky residue, and voila, a completed gel manicure.
Good Bits:
* Easy-to-follow instructions.
* Easy to use products.
* Manicure DID last for over 14 days. I didn't go easy on it either, it survived an action-packed holiday (and much price-tag picking/peeling) with ease.
* The colours don't run/smudge when you apply the gel.
* Product refills can be re-ordered.
Bad Bits:
* Allow LOTS of time. You can't apply the gel until the polish is completely dry. I guess that's not so bad if you're using a one-coat colour. I used two colours and nail art, so that obviously added on a couple of hours drying time. I think with practice, I would get quicker/less cautious. Also, don't gauge the application time based on a salon application. 1) the salon know what they're doing!! 2) whilst one hand is curing at the salon, the tech is applying to the other hand. Unless you are a mouth-painter, you cannot do this yourself.
* It took a good few wipes to get rid of the sticky residue. The instructions make it sound like a quick swipe with the pad will get rid of it. I found I had to rub quite hard, and even after I washed my hands there were still a couple of stubborn sticky bits. Now, that's probably down to my inexperience at using the kit, but I did begin to wonder if I'd made a mistake at one point.
I don't think the products are as strong as the ones used in salons. From what I understand, every brand of gel/acrylic cures at a different rate, and the lamps are designed to work with one brand only (ie, for Shellac, only use a Shellac lamp), so whilst you can get refills for the products in the kit (and replacement lamp bulbs), you should ONLY use those products ordered from the Rio website. The refills didn't look too expensive when I checked it out, and there are also extras not included with the kit that are available.
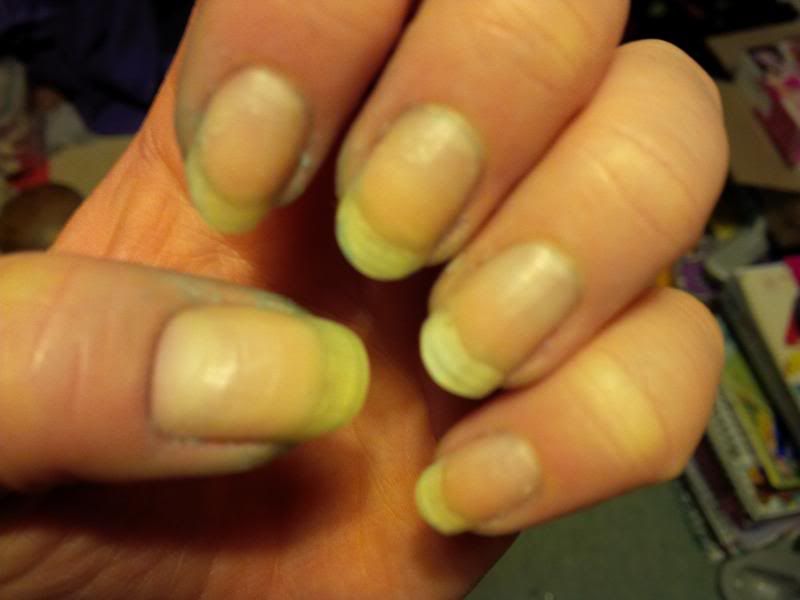
The golden rule it gives you is to NOT pick off the gel. The golden rule is AWAYS do not pick off the gel. Well, the golden rule does not allow for an 8.5hr plane journey, now does it?! Anyway, whether it was because it was 16 days old, or whether it was because I have notoriously oily nails (I can usually remove nail polish in a complete piece if it's been on long enough), most of it actually peeled off rather easily when picked. That could be because, certainly on my left hand, I was a bit over-generous when applying the gel so some of it had set on my finger, and given a nice edge to start picking when it started to grow out a bit (I know, I'm terrible. Don't do it, you'll ruin your nails!).
However, the proper method of removal is soaking cotton balls in acetone (actually, I didn't want to waste what came with the kit, so I used a regular Sally Hansen polish remover, just make sure it's not the acetone-free version or you'll be there forever) and then wrap your acetone-budded nails in foil for 10 minutes.
TIP: if you use face-wipes/baby wipes that are that weird throw-away fabricky stuff, save them, and cut them into doubled squares big enough to cover your nails. They sit better and are much easier to wrap in foil than lumpy cotton wool.
At some stage, I will most probably buy a kit. I really liked it, I could get much better results with better practice and, best of all, my nails sustained NO damage, which has never been something I was able to say after having gels applied/removed at a salon. I didn't have to trim my nails down at all following removal, and with previous gel experiences I ended up having to cut off damaged nail and start again from scratch. Plus, just think of the things you could do! Glitter! Caviar! Nail art that lasts for 2 whole weeks! I get a little bit giddy thinking about it. Also, in summer when I brave sandals and paint my toenails, my mani-pedi cycle always gets out of sync and I end up having to take of my toenail polish wearing plastic gloves so that I don't damage my manicure...So it would be nice to avoid that.
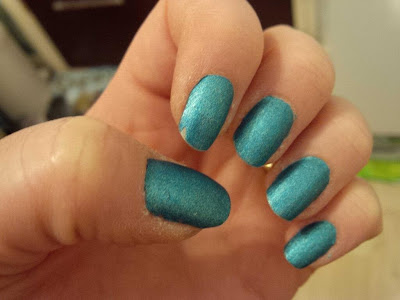
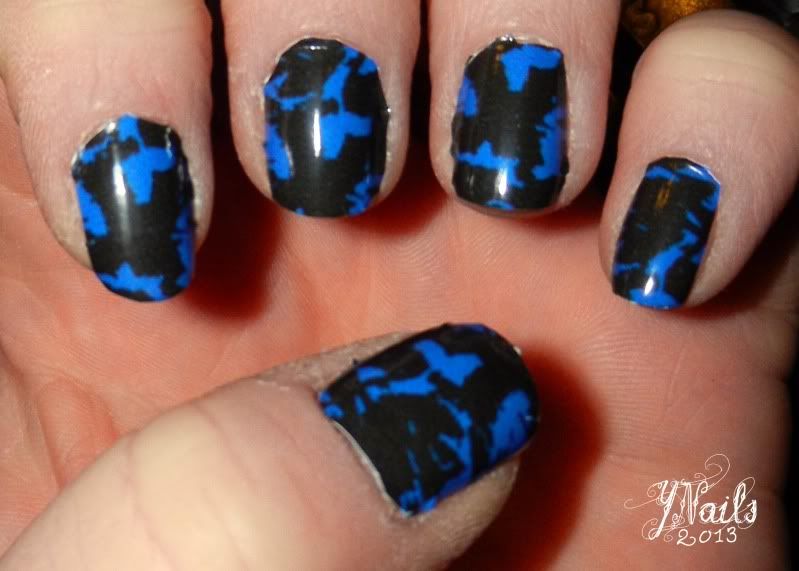
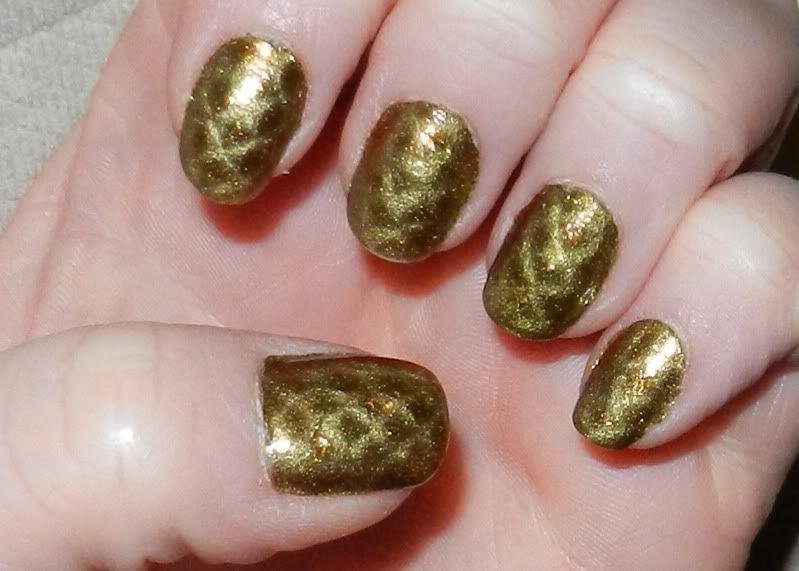
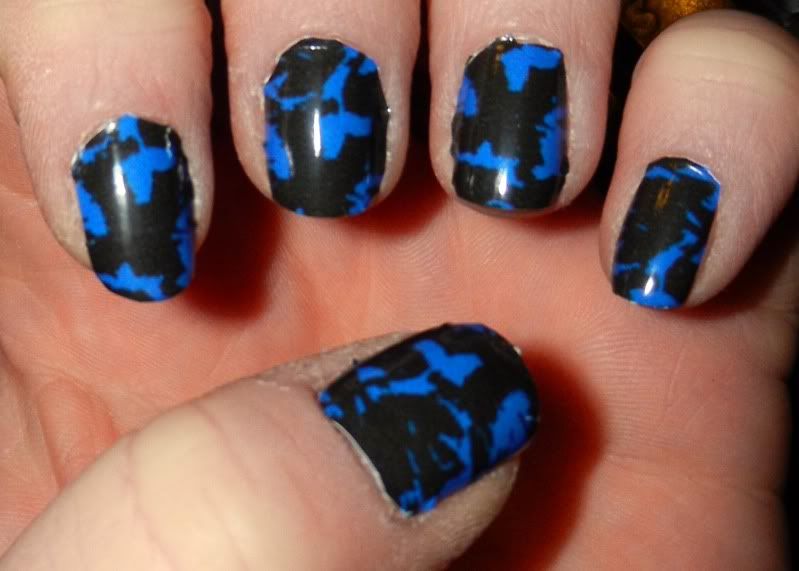
Anyway, I know you don't care about my ramblings, so on with the photographs!
I got SO many compliments on my nails every day we were in America...Someone even asked if I had them done in the park at the Bibbidy-Bobbidy-Boutique!!!!!!!!!!!!!! I think the "hidden Mickey" sealed the deal. :)


